Menu Editor
This Lesson demonstrates how to build menus in VB programs.
EXAMPLE 1:
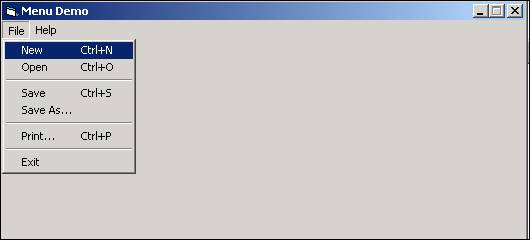
The end result of Example 1 will be a form containing a menu with two top-level items, File and Help.
The File menu, shown below, will have the following level-two items below it: New, Open, Save, Save As, Print, and Exit. Note that separator bars appear above the Save, Print, and Exit items.
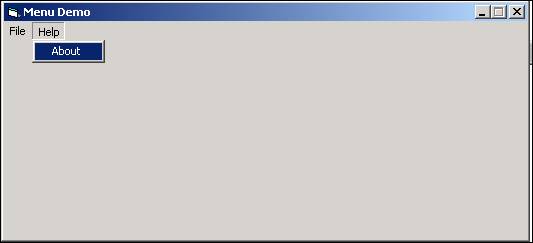
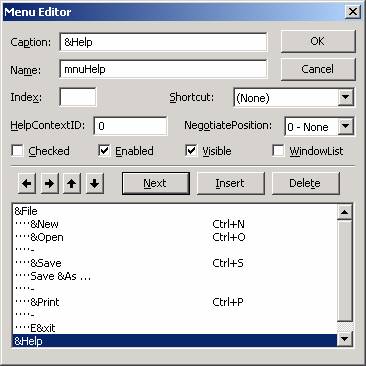
The Help menu contains just one level-two item below it, About.
To build a menu for use with your VB program, you use the Menu Editor, which appears as an icon in the toolbar of the VB IDE. It is the circled item in the screen shot below:

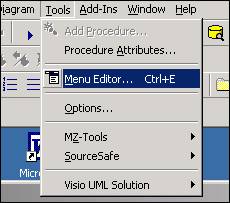
Alternatively, you can invoke the Menu Editor from the Tools menu item as shown below:
To build the menu described above, perform the following steps.
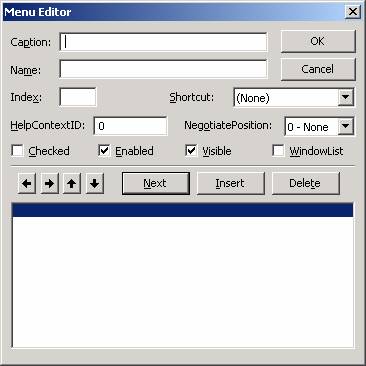
1. Start a new VB project and invoke the Menu Editor using either method shown above (click the Menu Editor toolbar icon or select the Menu Editor option from the Tools menu). The Menu Editor screen appears, as shown below:
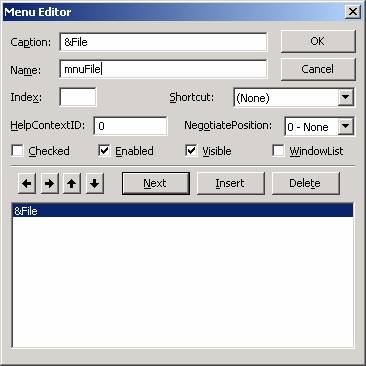
2. For "Caption", type &File (by placing the ampersand to the left of the "F", we establish "F" as an access key for the File item it enables the user to drop down the File menu by keying "Alt+F" on the keyboard in addition to clicking the "File" item with the mouse).
For "Name", type mnuFile.
Your Menu Editor screen should look like this:
Click the Next button.
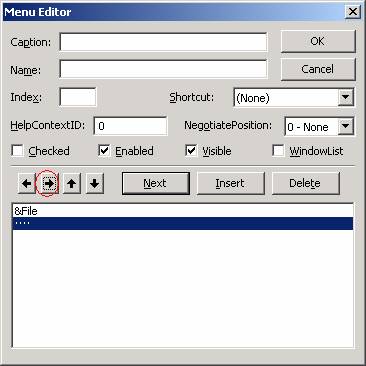
3. Click the "right-arrow" button (shown circled below). A ellipsis (...) will appear as the next item in the menu list, indicating that this item is a level-two item (below "File").
For "Caption", type &New; for "Name", type mnuNew, and for "Shortcut", select Ctrl+N. By specifying a shortcut, you allow the user to access the associated menu item by pressing that key combination. So here, you are providing the user three ways of invoking the "New" function: (1) clicking File, then clicking New on the menu; (2) keying Alt+F,N (because we set up an access key for "N" by placing an ampersand to left of "N" in "New"); or (3) keying Ctrl+N. At this point, your Menu Editor screen should look like this:
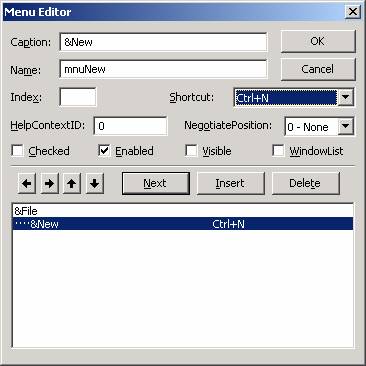
Click the Next button.
4. For "Caption", type &Open; for "Name", type mnuOpen, and for "Shortcut", select Ctrl+O. Your Menu Editor screen should look like this:
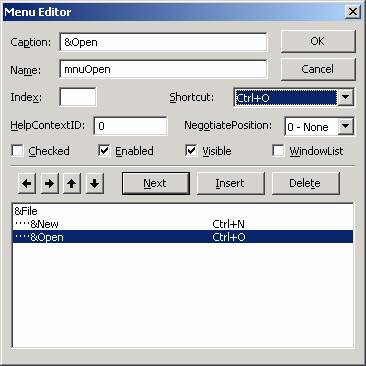
Click the Next button.
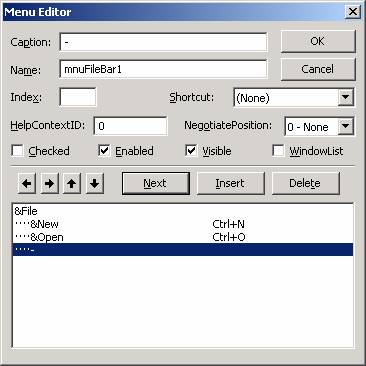
5. For "Caption", type - (a hyphen), and for "Name", type mnuFileBar1. A single hyphen as the Caption for a menu item tells VB to create a separator bar at that location. Your Menu Editor screen should look like this:
Click the Next button.
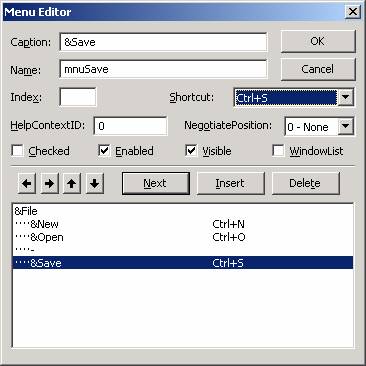
6. For "Caption", type &Save; for "Name", type mnuSave, and for "Shortcut", select Ctrl+S. Your Menu Editor screen should look like this:
Click the Next button.
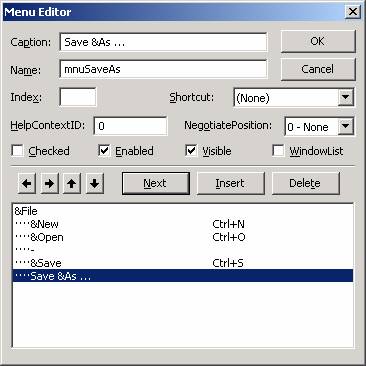
7. For "Caption", type Save &As ..., and for "Name", type mnuSaveAs. Your Menu Editor screen should look like this:
Click the Next button.
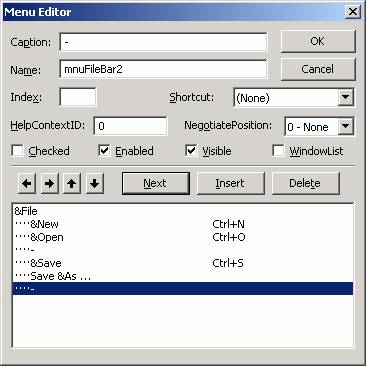
8. For "Caption", type -, and for "Name", type mnuFileBar2. Your Menu Editor screen should look like this:
Click the Next button.
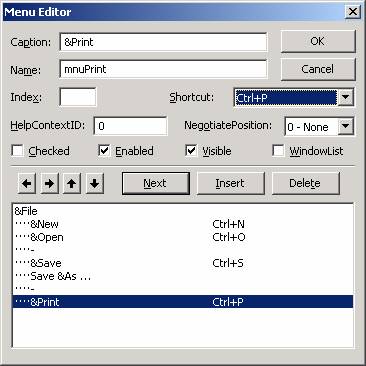
9. For "Caption", type &Print;for "Name", type mnuPrint; and for "Shortcut", select Ctrl+P. Your Menu Editor screen should look like this:
Click the Next button.
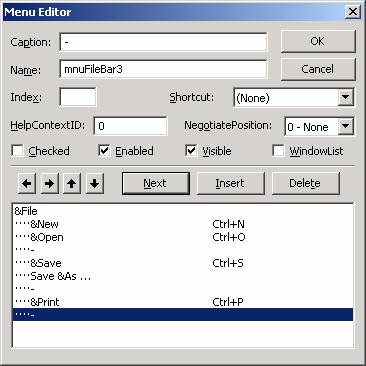
10. For "Caption", type -; and for "Name", type mnuFileBar3. Your Menu Editor screen should look like this:
Click the Next button.
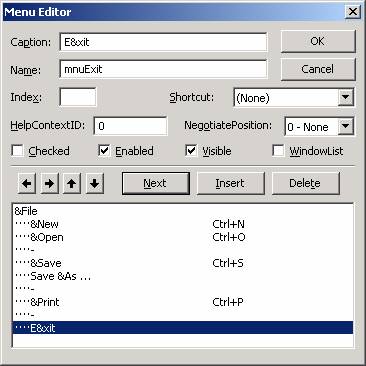
11. For "Caption", type E&xit, and for "Name", type mnuExit. Your Menu Editor screen should look like this:
Click the Next button.
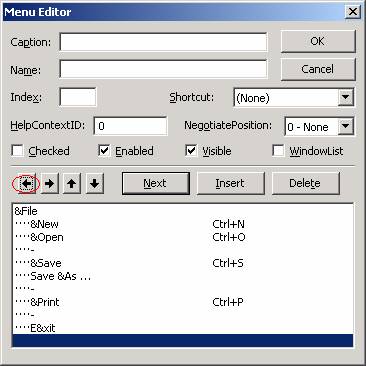
12. Click the "left-arrow" button (shown circled below). The ellipsis (...) no longer appears, meaning we are back to the top-level items.
For "Caption", type &Help; and for "Name", type mnuHelp. Your Menu Editor screen should look like this:
Click the Next button.
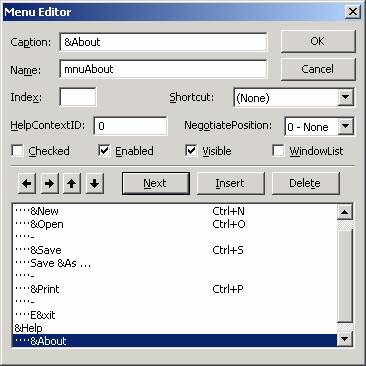
13. Click the "right-arrow" button to create a level-two item below "Help". For "Caption", type &About; and for "Name", type mnuAbout. Your Menu Editor screen should look like this:
14. At this point, we are done creating our menu entries, so click the OK button. That will dismiss the menu editor and return focus to the VB IDE.
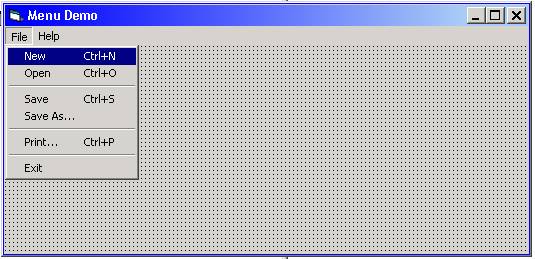
15. Back in the VB IDE, your form will now have a menu, based on what you have set up in the Menu Editor. If you click on a top-level menu item (File for example), the level-two menu will drop down:
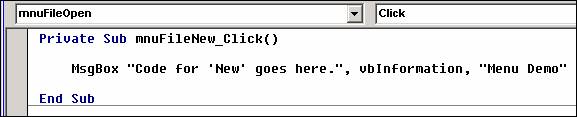
16. Click on the New menu item. The code window for the mnuFileNew_Click event opens, as shown below. Note: Click is the only event that a menu item can respond to.

In thePlace mnuFileNew_Click event, place the code you want to execute when the user clicks the New menu item. Since this is just a demo, we will place a simple MsgBox statement in the event procedure:
MsgBox "Code for 'New' goes here.", vbInformation, "Menu Demo"
17. Code similar MsgBox statements for the Open, Save, Save As, and Print menu items:
Private Sub mnuFileOpen_Click()
MsgBox "Code for 'Open' goes here.", vbInformation, "Menu Demo"
End Sub
Private Sub mnuFileSave_Click()
MsgBox "Code for 'Save' goes here.", vbInformation, "Menu Demo"
End Sub
Private Sub mnuFileSaveAs_Click()
MsgBox "Code for 'Save As' goes here.", vbInformation, "Menu Demo"
End Sub
Private Sub mnuFilePrint_Click()
MsgBox "Code for 'Print' goes here.", vbInformation, "Menu Demo"
End Sub
18. For the Exit menu item Click event, code the statement Unload Me.
Private Sub mnuFileExit_Click()
Unload Me
End Sub
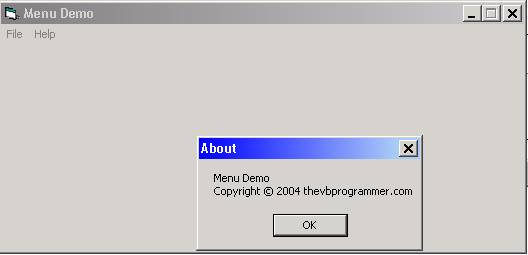
19. For the About menu item Click event, code as shown below:
Private Sub mnuHelpAbout_Click()
MsgBox "Menu Demo" & vbCrLf _
& "Copyright " & Chr$(169) & " 2004 thevbprogrammer.com", , _
"About"
End Sub
20. Run the program. Note how the code executes when you click on the various menu items. Also test the use of the access keys (e.g., Alt+F, N) and shortcut keys (e.g., Ctrl-O).
21. Save the program and exit VB.
Download Installer
